This guide will help you install osTicket Awesome for the first time into a directory on your self-hosted Linux server.
Most people install osTicket Awesome into a directory. You can name that directory anything that you want. Common names that people use are osticket, helpdesk or support.
For the purpose of these instructions we will assume that your website is www.your-domain.com and that the support directory will be in your web root, thus your osTicket Awesome installation will be www.your-domain.com/support
(Your web root may be called public_html, www, httpdocs or something different depending on your web server configuration)
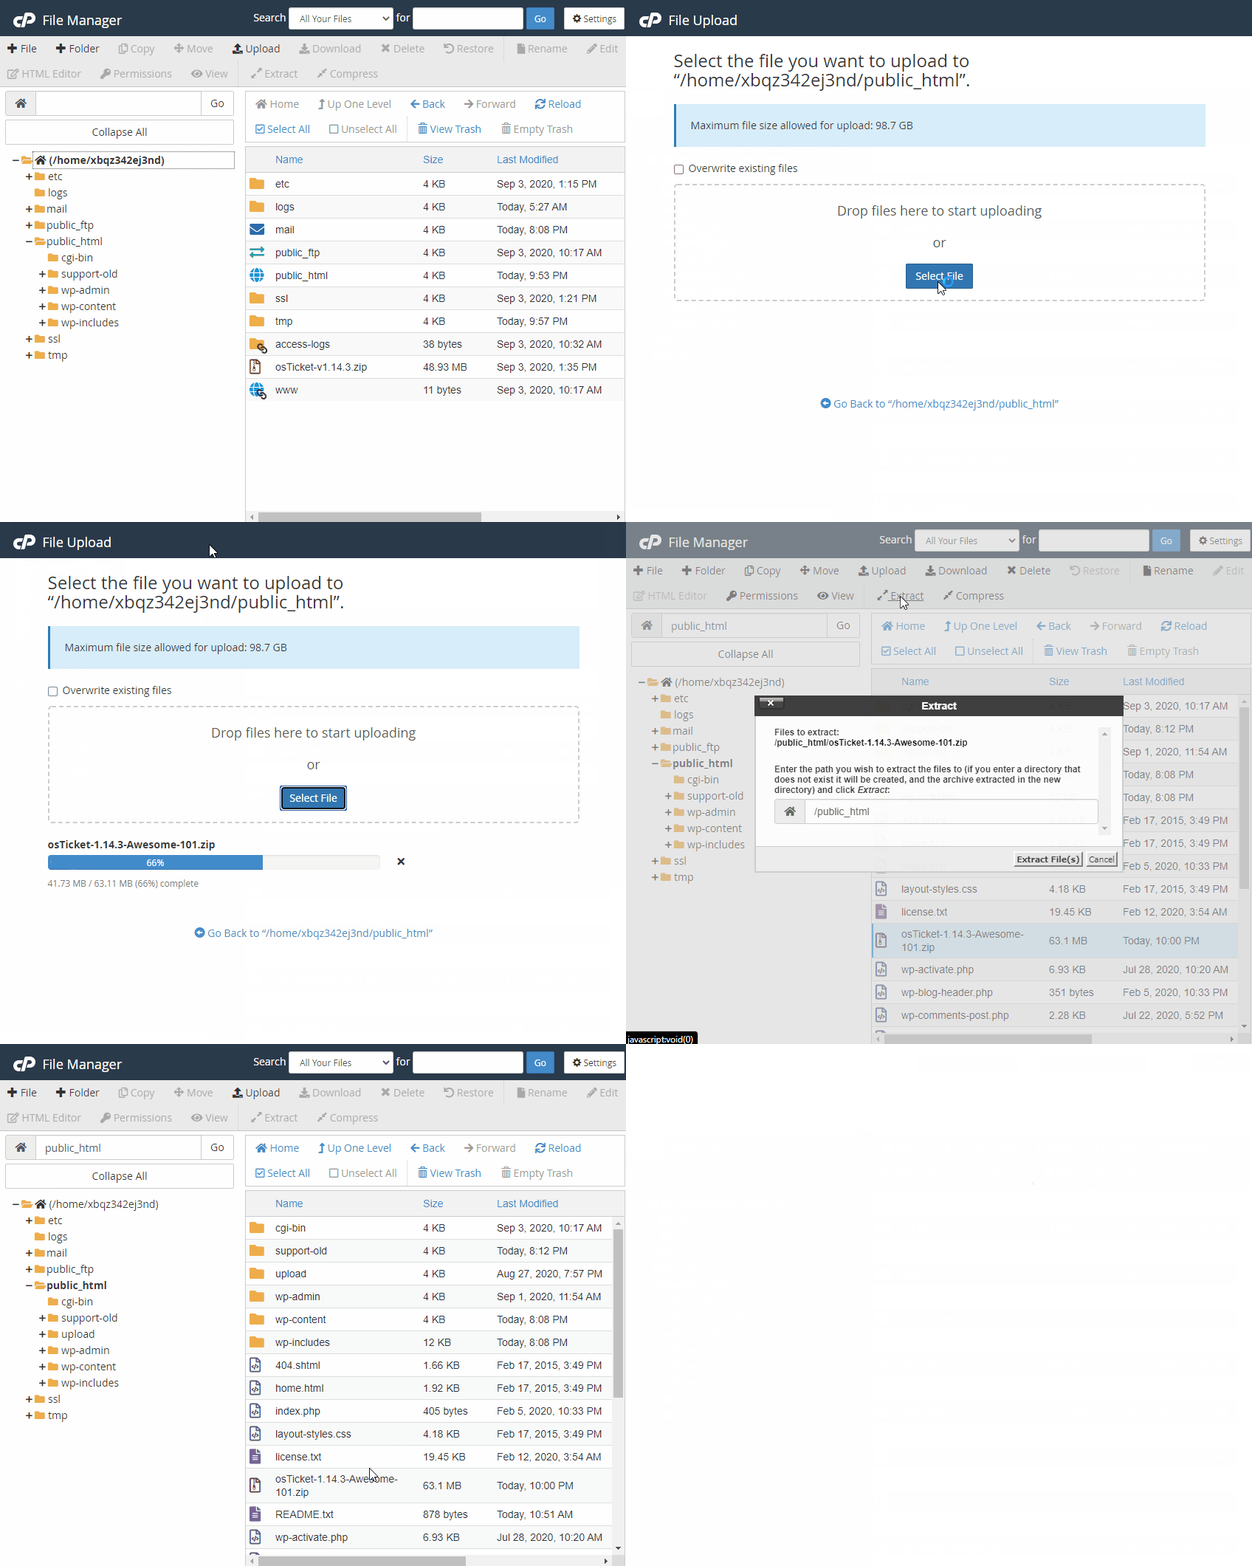
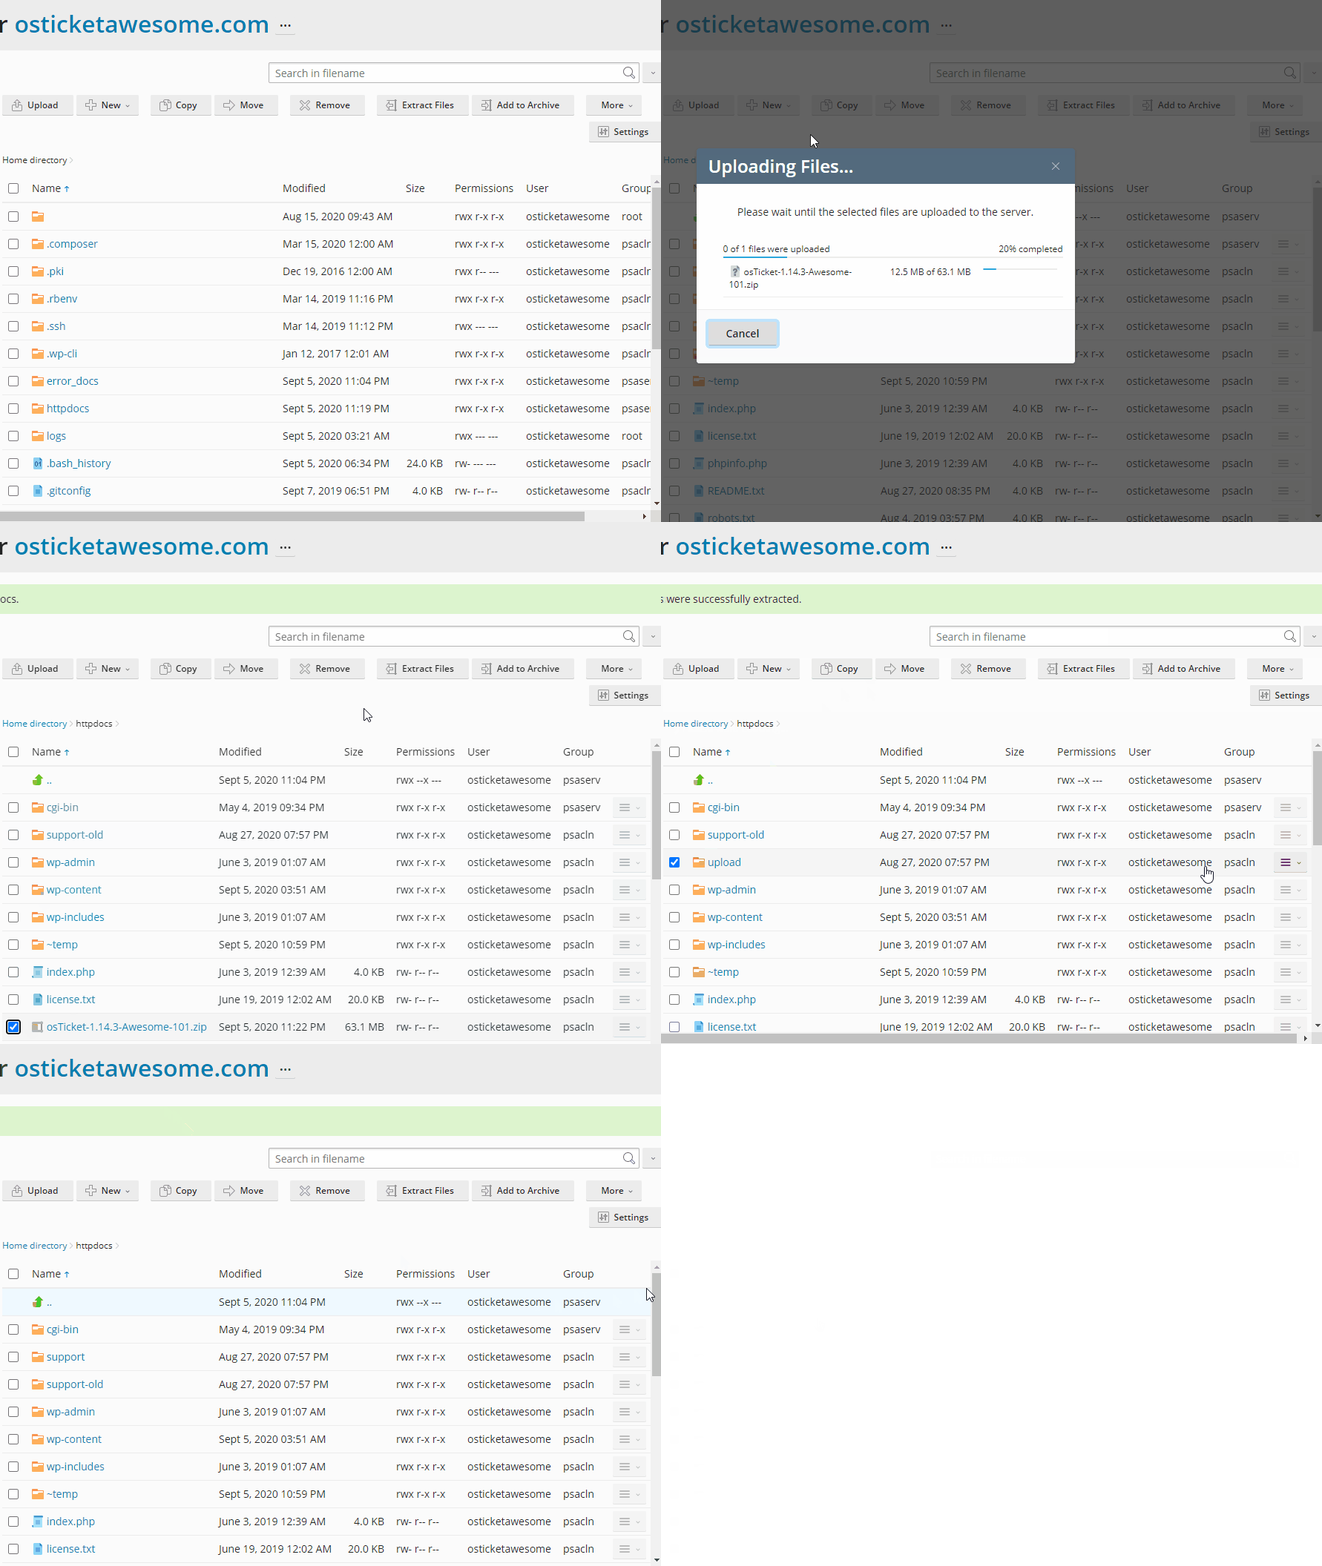
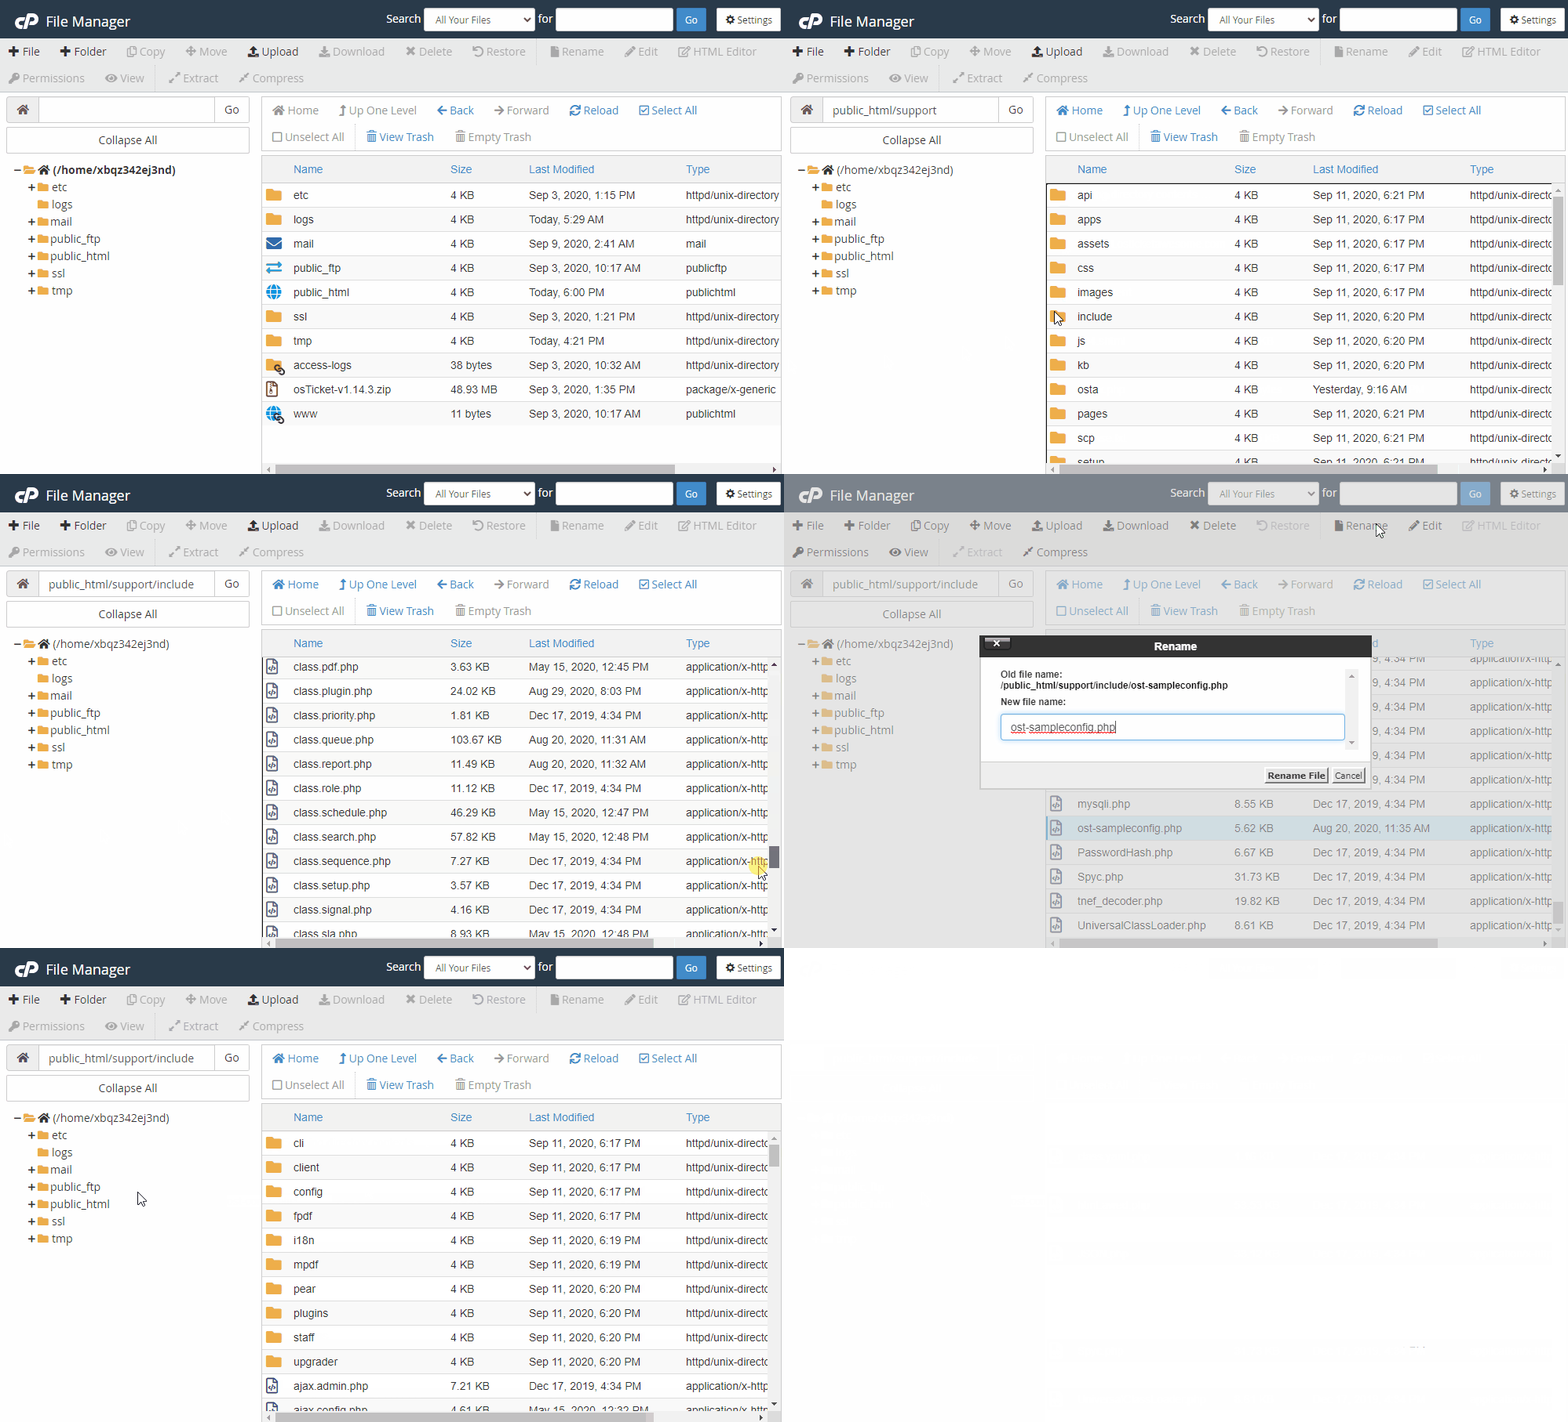
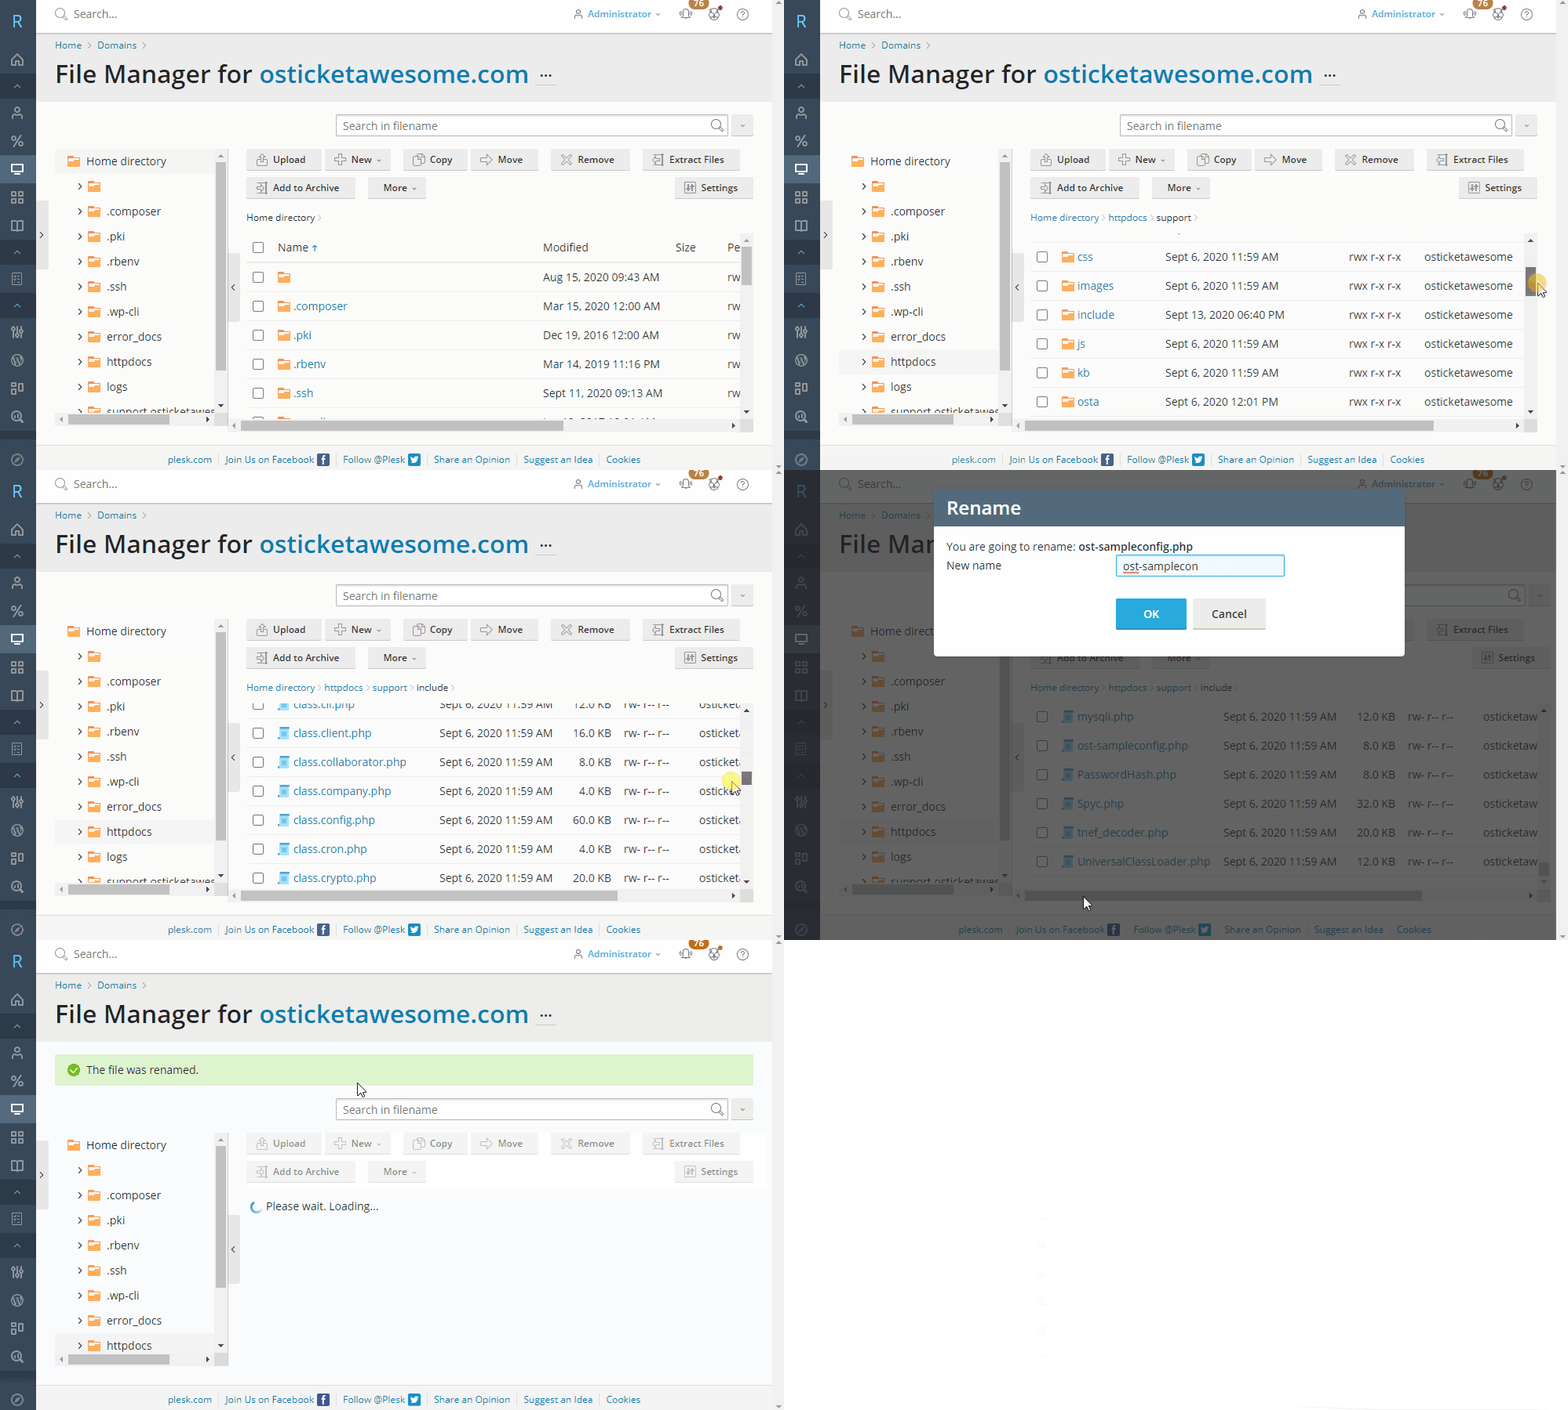
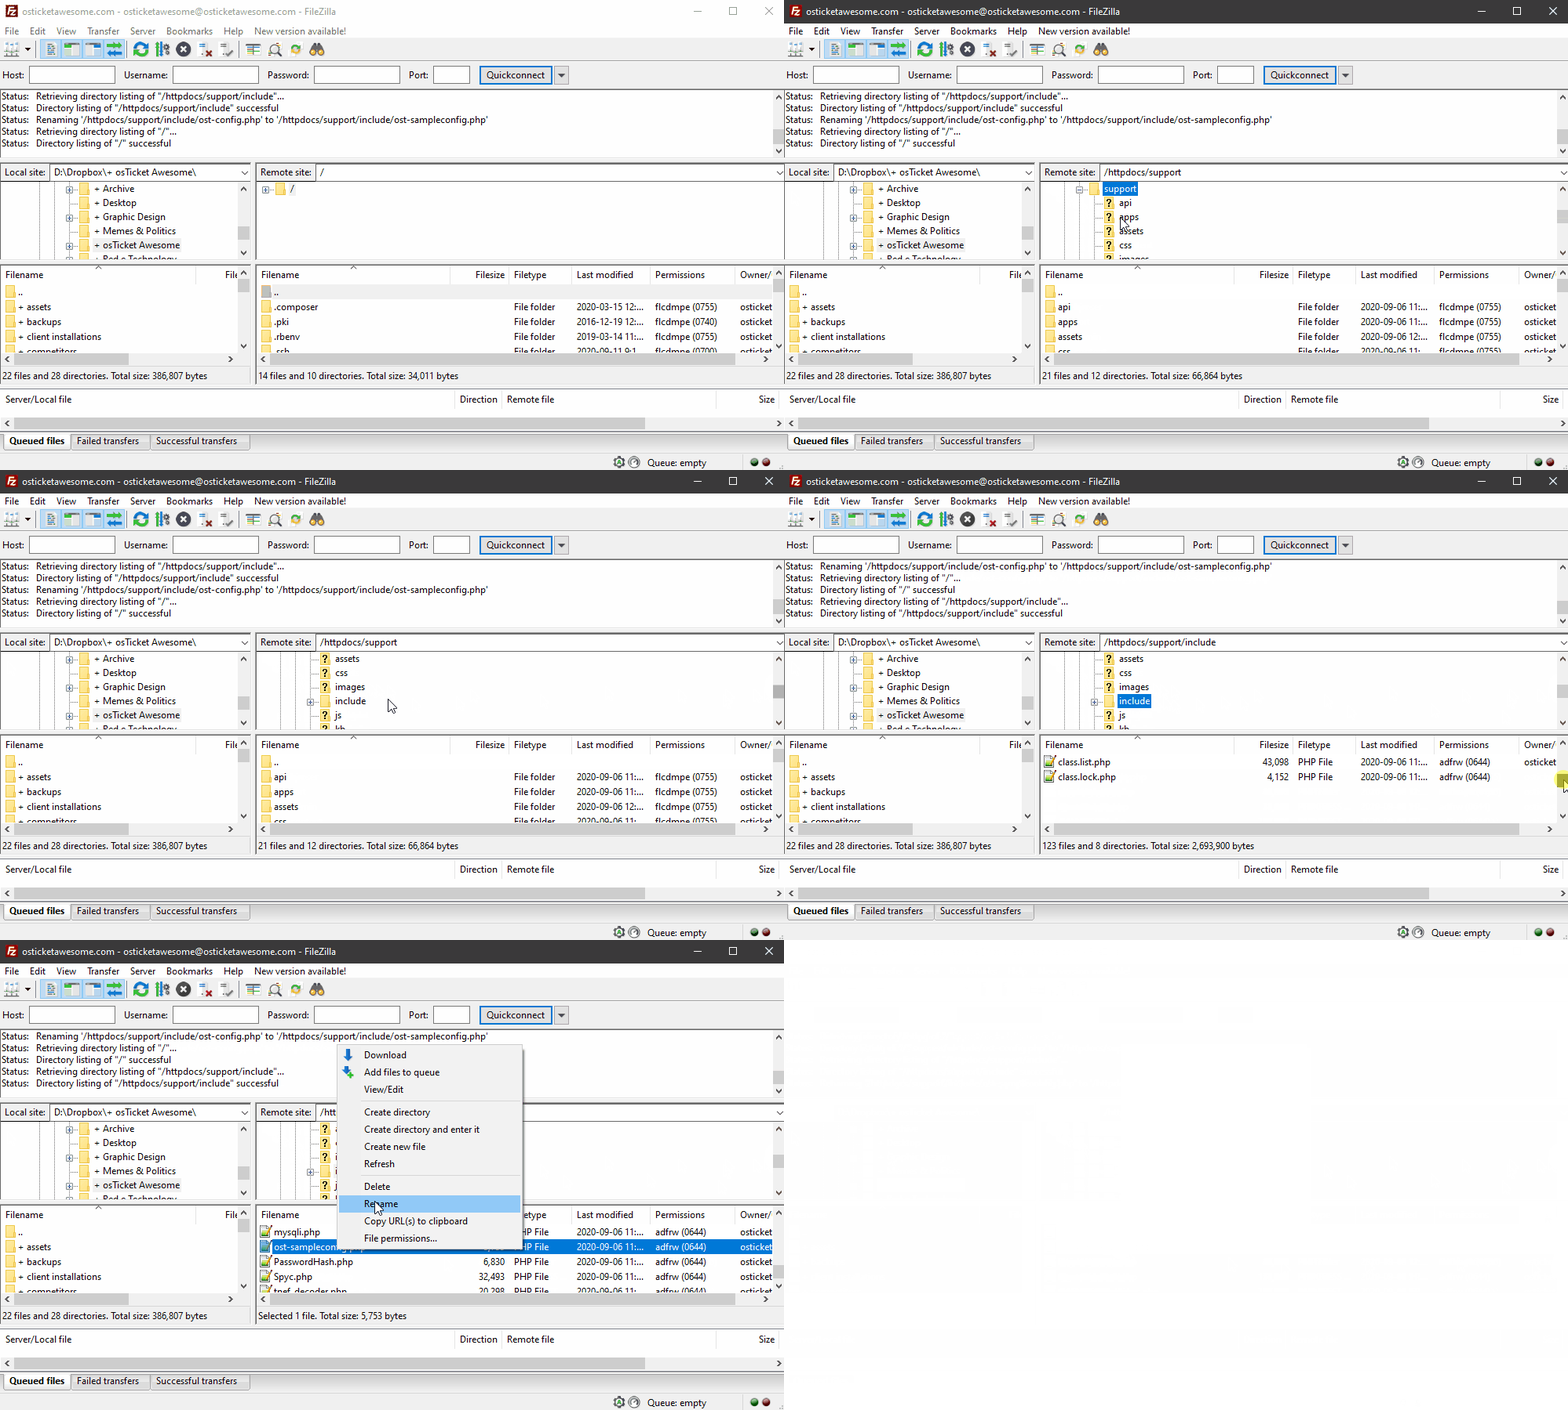
Download and extract the latest osTicket Awesome .zip. Put the upload folder in your web root directory. Rename it to support.
Rename include/ost-sampleconfig.php to include/ost-config.php
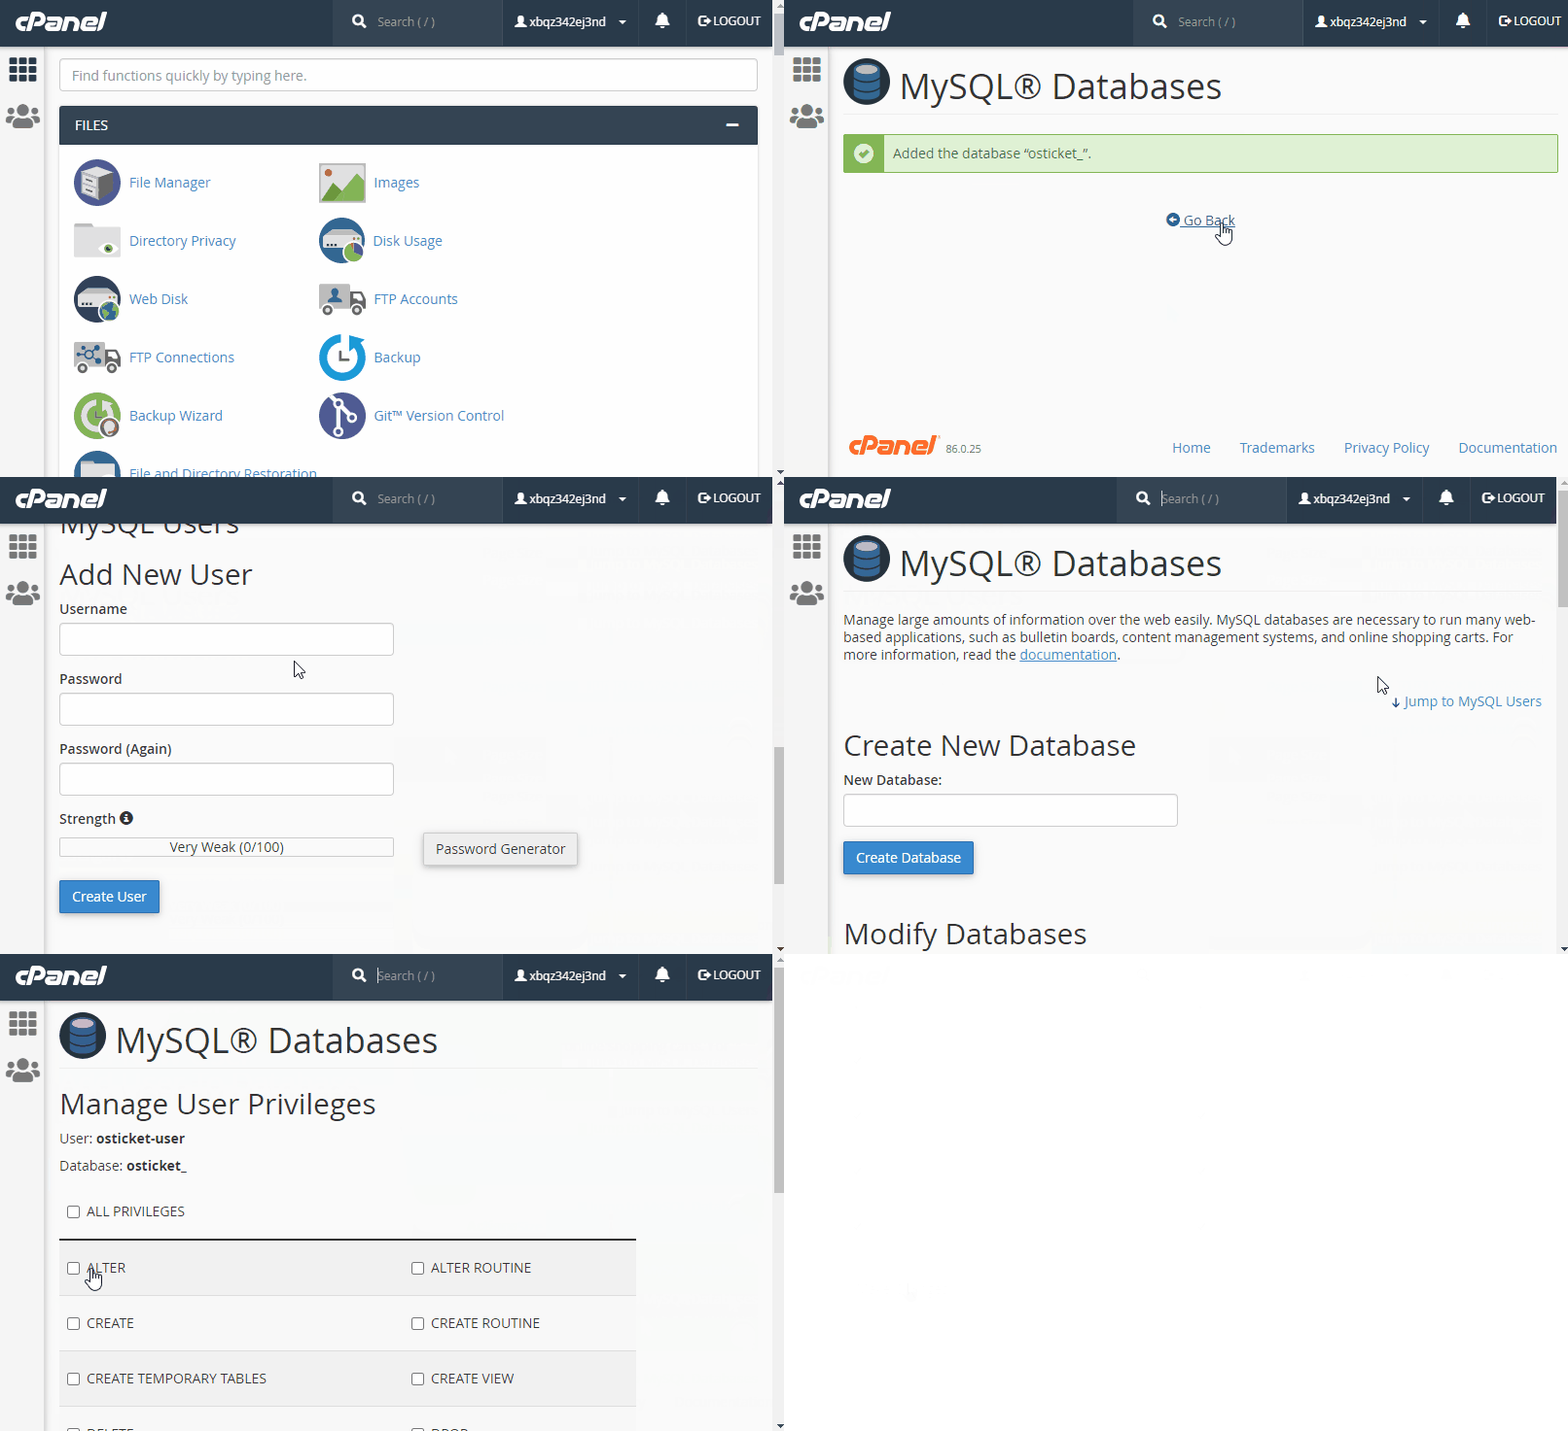
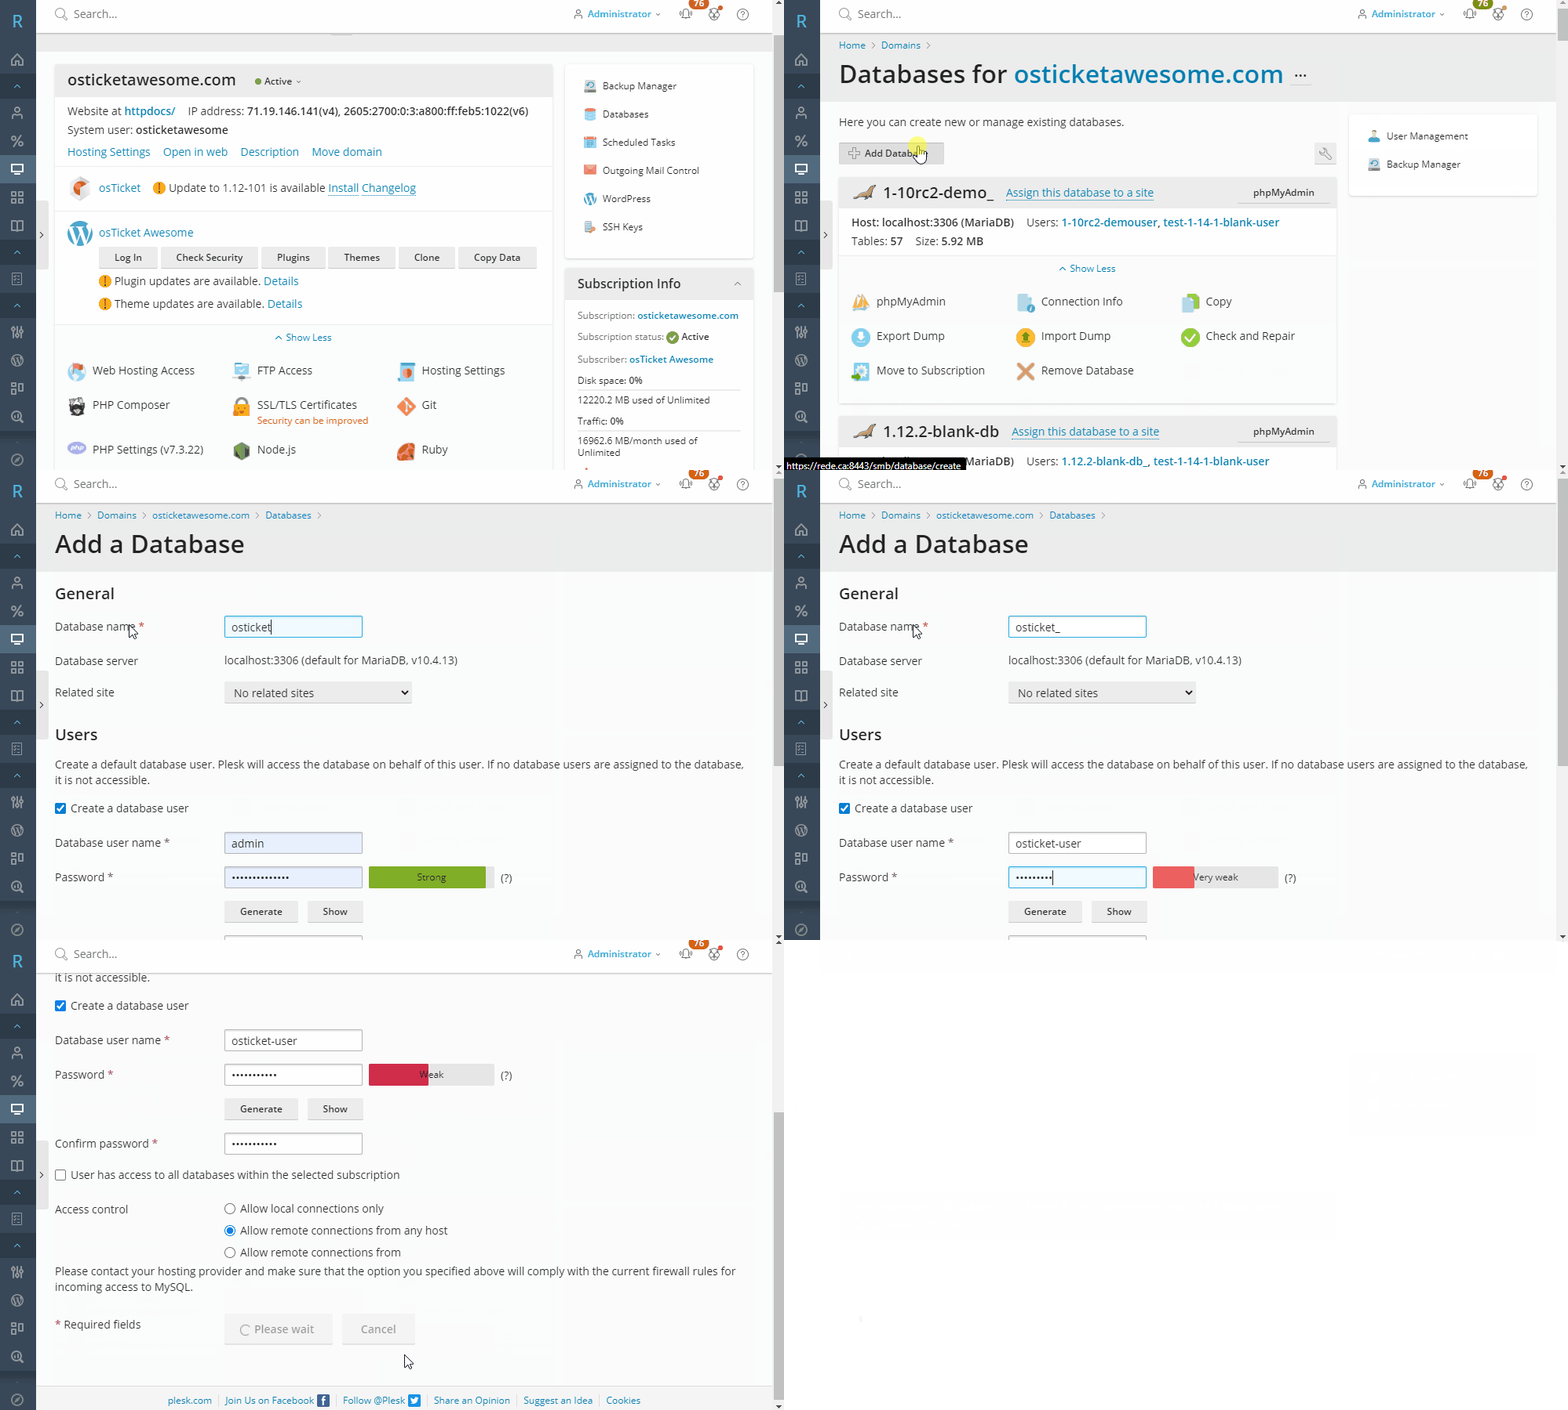
Create a database using cPanel, Plesk, phpMyAdmin or CLI. Create a user for your database.
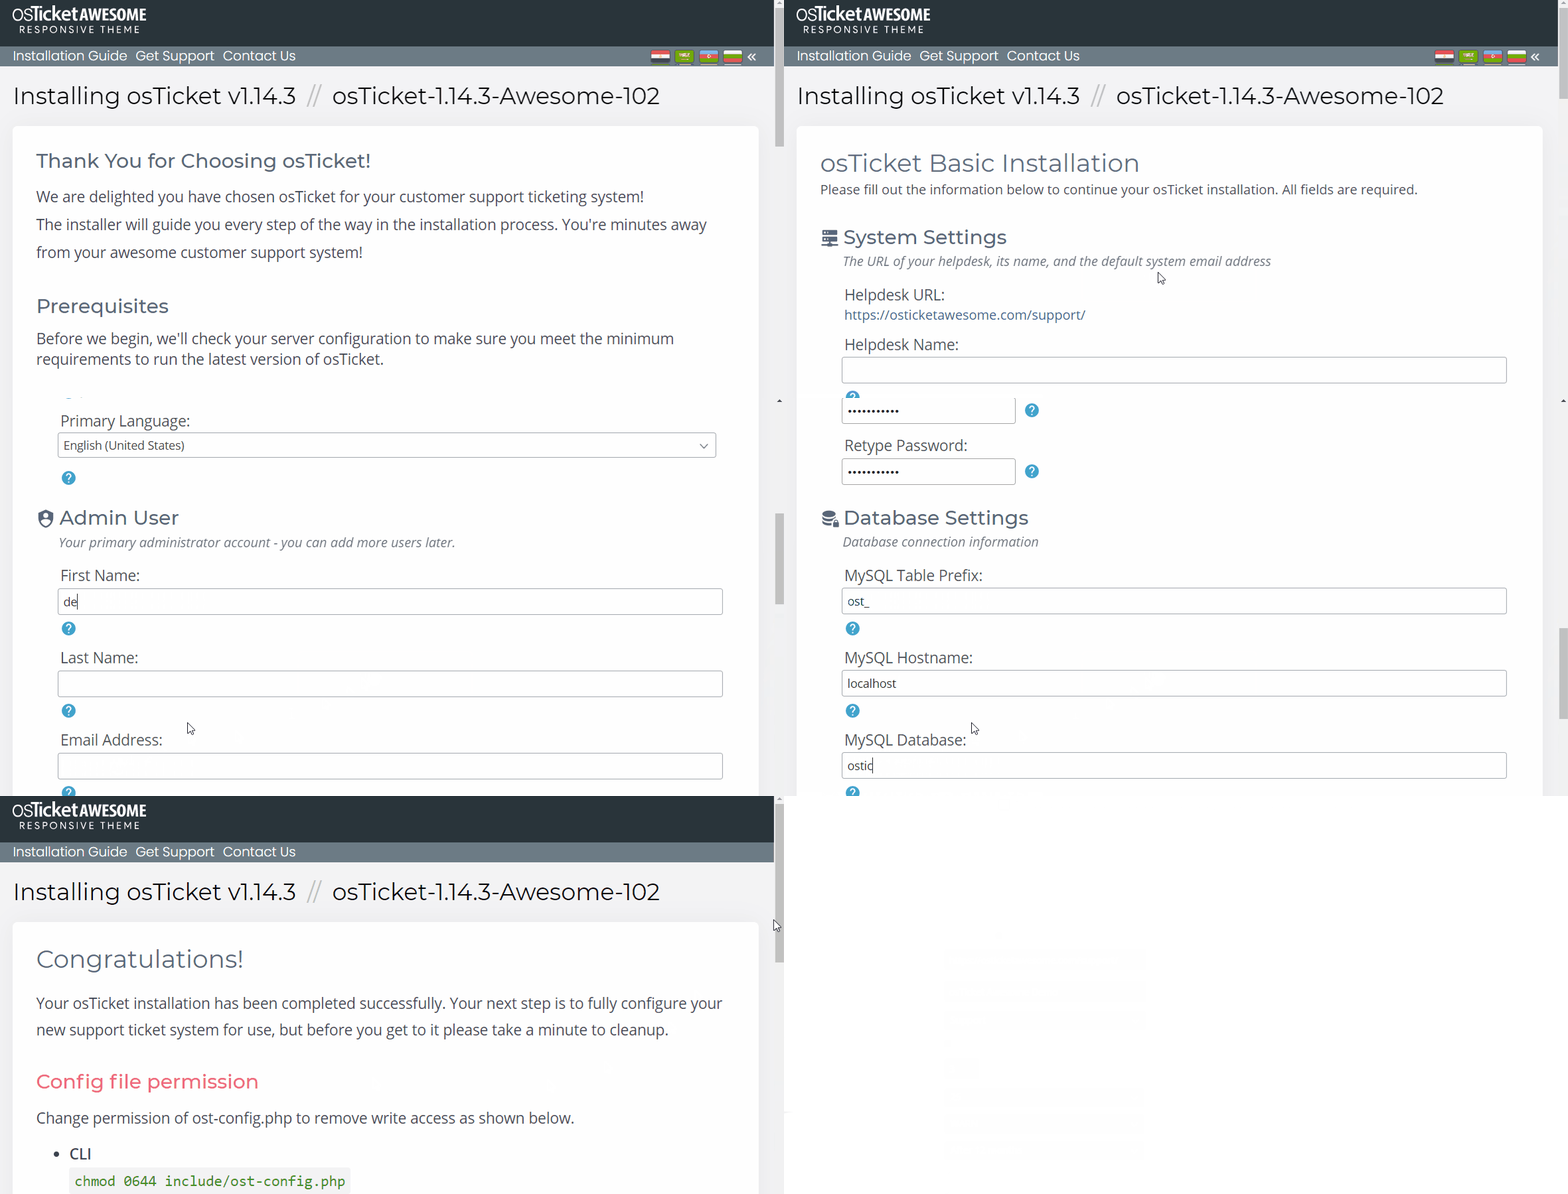
Go to www.your-domain.com/support and follow the prompts to complete the installation
That's it! Always clear your browser cache after installing an update
Now take a look at our post-installation tasks
